
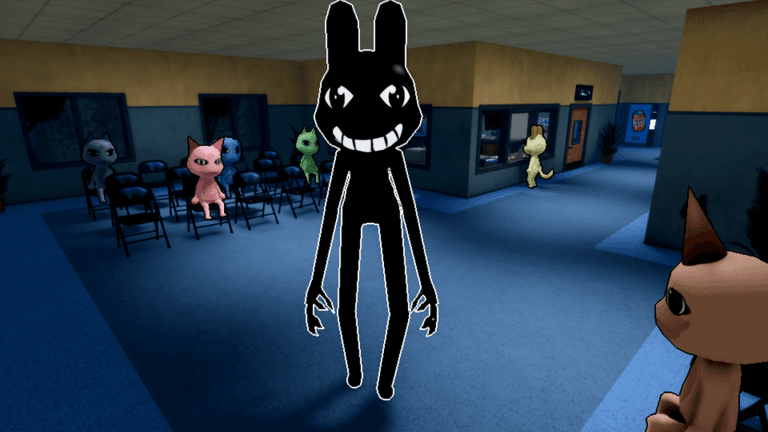
The current Animal Hospital map is organized around Check-In and the control area, the Lobby, a Staff Only or shop area, Medical Wing Rooms 1–5 and Emergency Wing Rooms 6–8. Room 6 contains X-Ray equipment, Room 7 uses the Heart Monitor and Room 8 is Surgery. Story spaces such as the Room 5 safe are conditional locations, not normal treatment rooms.
Map overview
| Area | Use |
|---|---|
| Check-In and control area | Starts patient flow and anchors the front of the hospital |
| Lobby | Connects reception with the main corridors |
| Staff Only or shop area | Separate staff and purchase space |
| Medical Wing | Rooms 1 through 5 |
| Emergency Wing | Rooms 6 through 8 |
This structure is more useful than memorizing a screenshot orientation because the player can navigate by function. Start at the front, identify the correct wing and then follow the numbered-room requirement from the current diagnosis.
Medical Wing Rooms 1–5
The Medical Wing contains Rooms 1 through 5. These rooms form the core numbered treatment area. The exact patient assignment should still come from the live case rather than from an assumption that every ordinary treatment belongs in the same room.
Room 5 also contains a conditional story location: the safe hidden behind the cat poster. That safe is connected to Ratthew’s key chain and reveals lore evidence. It is not a freely available supply cabinet or a normal reward room at the beginning of a run.
Emergency Wing Rooms 6–8
| Room | Specialized use |
|---|---|
| 6 | X-Ray equipment |
| 7 | Heart Monitor |
| 8 | Surgery and specialized surgery supplies |
Learn these three routes before pressure rises so a specialized requirement becomes a destination rather than a search. Carrying the right item is only part of the task; the case must reach the equipment or room named by the current interaction.
A practical navigation route
- Begin at Check-In and read the patient information.
- Move through the Lobby toward the appropriate wing.
- Use the room number or equipment requirement to select the destination.
- Return toward the front only after the current case is complete or handed off.
- Visit the Room 5 poster only when the Ratthew key interaction has made it relevant.
In team play, call both wing and room number. “Emergency Wing, Room 7” is clearer than “the monitor room” to someone still learning the layout. In solo play, group supply collection with the route but do not carry unverified medicine just to save a trip.
Use the Lobby as a reset point when a route becomes confusing. From there, reorient toward the front desk or the named wing instead of opening every door. That habit reduces wandering and makes handoffs easier: a teammate can direct the player from one shared landmark to a specific numbered destination.
Calling routes in a team
Use the wing, room number and task in that order: for example, “Emergency Wing, Room 7, Heart Monitor.” A numbered call prevents another player from following only the equipment name or entering the wrong wing. When a route changes, repeat the new destination instead of assuming everyone saw the same prompt.
For ordinary Medical Wing cases, use the live patient assignment because Rooms 1–5 do not share one fixed function in this route summary. For the specialized Emergency Wing, the room number provides the stable navigation cue.
Story and conditional locations
Room 5 contains a hidden safe behind the cat poster. Opening it requires the key left after Ratthew’s multi-part interactions, and its contents relate to Rattina and a Shadow experiment rather than a class stat or weapon upgrade.
Keeping conditional story spaces separate from the normal map avoids two errors: sending beginners toward a locked interaction and presenting lore access as routine treatment navigation. Follow the current room label when a later update changes a door or corridor.
Troubleshooting navigation
If the expected equipment is absent, confirm that the player entered the right numbered room and that the current diagnosis actually calls for it. If a story interaction does not appear, check whether its character chain and item pickup are complete. Do not use an out-of-bounds glitch as the default route.
The layout can change after an expansion. Follow the live wing and room signage when it differs from this dated route.
Map knowledge does not decide treatment by itself. A patient assigned to specialized equipment still needs the correct case information, and a remembered room cannot override a changed live prompt. Navigation should shorten the route after the requirement is known, never substitute for reading it.
Common mistakes
- Do not send every diagnosis to the same room.
- Finish Ratthew’s chain and collect the key before expecting Room 5 safe access.
- Do not treat a hidden story space as a medicine location.
- Do not teach out-of-bounds movement as ordinary navigation.
Frequently asked questions
Where is the X-Ray room?
Room 6 in the Emergency Wing is the X-Ray location.
Which room has the Heart Monitor?
Room 7 is the Heart Monitor room, while Room 8 is Surgery.
What is behind the Room 5 poster?
A hidden safe connected to Ratthew’s key story. It contains lore clues, not a combat or stat reward.