
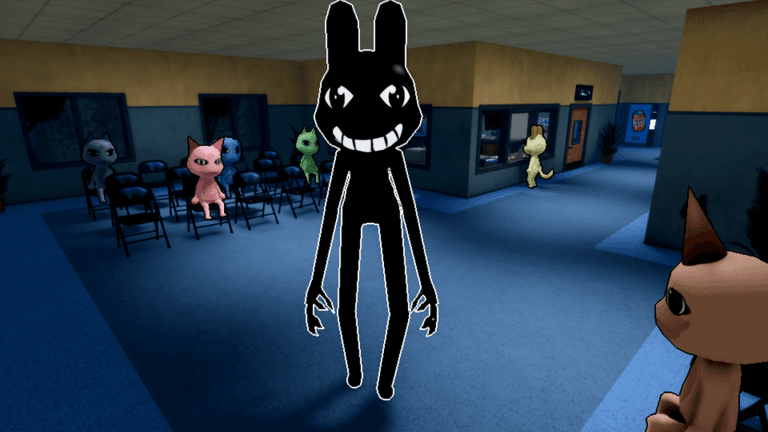
This Animal Hospital Roblox wiki is an independent beginner guide, not a developer-run wiki. Use it to learn the patient loop, navigate the hospital and reach focused pages for classes, medicine, anomalies and recurring characters. Check live prompts before purchases or treatment after an update.
Quick start
Begin at Check-In, read the patient information and identify the destination before collecting supplies. Learn the Lobby and both wings early so a room requirement becomes a route rather than a search. When a patient seems suspicious, inspect the model, compare the developed photo and check CCTV before admission.
Use the focused class page before spending currency and the medicine page before treating a diagnosis you do not recognize. Open the character pages when Ratthew, Liz or Barney starts a multi-step interaction.
Beginner gameplay loop
- Start at Check-In and read the patient information.
- Inspect suspicious cases through appearance, reference photos and CCTV.
- Match the diagnosis to the known treatment item.
- Move to the correct room or specialized equipment.
- Return to patient flow while reacting to hostile warning cues.
- Record major character choices in the Journal.
Accuracy matters more than rushing the shift counter. A wrong treatment can kill a patient, while staring at the Stalker’s face creates a different danger. Learn each loop separately, then coordinate them during continued shifts.
Animal Hospital has no fixed final shift. Early play introduces systems and story events, but the run can continue as difficulty increases.
Classes and progression
The class roster contains Intern, Nurse, Secretary, Paramedic, Psychologist, Doctor, Security, Head Nurse, Surgeon and Secret Agent. Compare the current panel when choosing among their roles.
Intern is free and builds starting Sanity. Nurse adds inventory slots. Secretary restores Sanity for correct Check-In work. Surgeon rewards successful treatment with Sanity and speed. Head Nurse is a premium treatment class, while Secret Agent is the premium combat option.
Doctor has appeared at 300 or 900, while Secret Agent has appeared at 790 or 890 Robux and includes a Scanner in newer versions. Check the live class panel before spending.
Map and rooms
The hospital is organized around Check-In and the control area, the Lobby, a Staff Only or shop area, Medical Wing Rooms 1–5 and Emergency Wing Rooms 6–8. Room 6 has X-Ray equipment, Room 7 has the Heart Monitor and Room 8 is Surgery.
Room 5 also contains a conditional story safe behind a cat poster. It requires the key left after Ratthew’s interaction chain and should not be confused with a normal supply room. The safe reveals story clues rather than a class or combat reward.
Use wing and room number together when communicating. Map knowledge shortens the route after the requirement is known; it does not replace reading the diagnosis.
Medicine and treatment
Known pairings include Herbs for headache, Medicine for stomach ache, Thermometer for fever, Bandages for bleeding, Ointment for burns or rash, Cough Syrup for flu and Maple Syrup for low sugar. Dry-eye cases can use Eye Drops or IV-related wording, so follow the current prompt.
Follow the current prompt when it differs from the pairings above, and do not choose a treatment from real-world intuition. Inventory classes can carry more or submit items faster, but they cannot turn a wrong pairing into a safe one.
Specialized cases also depend on rooms and equipment. Surgery supplies belong in Room 8 when the current requirement calls for them.
Anomalies and enemies
Anomaly catalogues change between updates. Appearance, developed photos and CCTV are the three checks that matter before admission, so use them instead of a memorized total.
The Stalker is a roaming hostile encounter, not another patient anomaly. Flickering lights and sound are warning cues; lower the camera, avoid its face and move away. Gun and Taser attacks do not kill it. Reported Sanity loss ranges from two to ten, but the avoidance response stays the same.
Keeping patients and enemies separate prevents both inflated anomaly totals and the wrong encounter response.
Characters and story navigation
Ratthew, Liz or Lisbeth, and Barney have dedicated multi-step interactions. Ratthew leaves the key to the Room 5 safe. Liz conducts a camera investigation that requires the exact patient she names. Barney requests several items and ends with a hide-or-report branch.
Hiding Barney is associated with a second Coffee Machine; reporting follows the alternate Journal outcome without that machine. Ratthew and Liz timing can vary. Use the Journal for completed interactions and keep theories separate from displayed objects or dialogue.
Claims that Rattina became the Stalker or Shadow and definitive diagnoses of Barney remain unresolved. Keep those conclusions as theories unless later dialogue or Journal text states them directly.
Fast checks before acting
- Check the live class panel before buying Doctor or Secret Agent because their reported prices differ.
- Match the diagnosis to the current item prompt before treating a patient.
- Use the patient, photo and CCTV routine instead of a memorized anomaly total.
- Lower the camera and avoid the Stalker’s face rather than trying to shoot it.
- Review the Journal after a character choice or quest item.
Recommended navigation
New players should begin with the map and medicine guides, then compare classes only after identifying a recurring problem. Use the anomaly guide during patient checks and the Stalker guide for the hostile encounter response. Open character pages when a named NPC or Journal branch appears.
Players planning currency purchases should compare the all-classes overview with the specific class page. Lore readers should follow Ratthew to the key guide, then Liz and Barney, while keeping confirmed clues separate from theories.
Use the codes status page when the question is whether a current redemption system or active code exists.
Frequently asked questions
Where should I start?
Start with Check-In and the map, then learn the medicine pairings and three-part anomaly check before comparing specialist classes.
What should a beginner learn first?
Learn Check-In, the room layout, diagnosis-to-item matching and the difference between patient anomalies and hostile encounters before buying a specialist class.
Are all values permanent?
No. Prices, equipment, timing and anomaly lists can change. Read the live interface before purchasing, treating a patient or following an older route.