
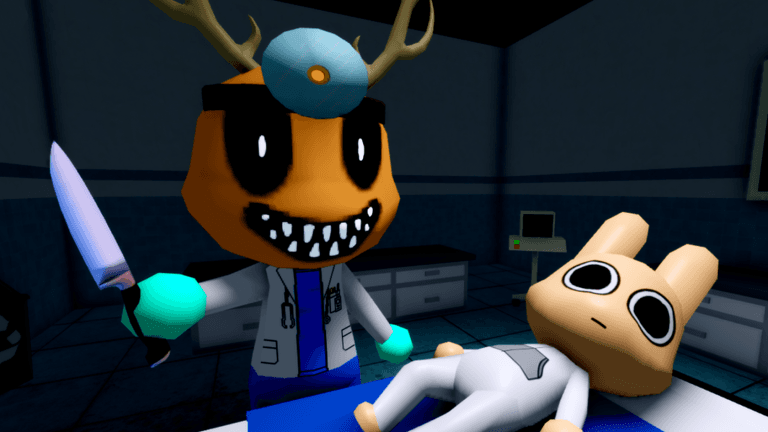
The Animal Hospital key comes from completing Ratthew’s interaction chain and collecting the item he leaves behind. Take it to Room 5, remove the cat poster and use the key on the hidden safe. The safe reveals story evidence about Rattina and a Shadow experiment rather than a combat or stat reward.
Requirements
Progress through Ratthew’s repeated interactions until the key becomes available. His first appearance can fall on different shifts, so follow the conversation chain rather than waiting for one promised number. The route remains Ratthew, dropped key, Room 5 poster, then safe.
Before leaving the final relevant interaction, check the area for the key and collect it. The item is not useful at a random staff door, and the Room 5 safe cannot be treated as a normal map fixture that opens without its story prerequisite.
It also helps to know the map before the key drops. Room 5 belongs to the Medical Wing, while Rooms 6–8 are the specialized Emergency Wing spaces. That separation keeps the player from searching X-Ray, Heart Monitor or Surgery equipment for an item whose destination is a story interaction.
Step-by-step key route
- Complete each Ratthew conversation and allow the chain to progress.
- Watch for the key after the final interaction.
- Pick up the key before moving away from the area.
- Travel to Room 5 in the Medical Wing.
- Interact with the cat poster to expose the hidden safe.
- Use the key and inspect the contents for story context.
The route uses ordinary interactions: finish Ratthew’s chain, collect the key and enter Room 5. A private server, out-of-bounds route or secret code is not part of these steps.
What the safe contains
The safe scene includes a Rattina photo, a confidential container or box and clues related to a Shadow experiment. These details extend the story surrounding Ratthew and the hospital. They are clues inside the mystery, not a class upgrade, weapon or currency payout.
The contents support a connection between named characters and experiments, but they stop short of confirming every transformation theory. In particular, the scene does not establish as fact that Rattina became the Stalker or Shadow.
Solo and team route tips
In solo play, finish the active patient step before crossing the hospital for Room 5 so the hidden scene does not erase the current treatment plan. In a team, announce that the key has dropped and that one player is taking it to the Medical Wing. That prevents teammates from searching unrelated rooms or waiting for the key holder at an Emergency Wing station.
After opening the safe, return to the task that was interrupted. The key route is a story detour, so it should not be mistaken for a new medicine pickup, class unlock or equipment assignment.
Common mistakes
The easiest failure is leaving before collecting the dropped key. Completing the dialogue is not enough if the item remains on the ground or in the interaction area. Check that the key is actually obtained before heading to Room 5.
- Do not test the key on random staff doors.
- Do not search Room 5 before progressing Ratthew’s chain.
- Do not overlook the cat poster interaction.
- Do not expect coins, a weapon or a class perk from the safe.
- Open the safe for its story scene, not for proof of Rattina’s final identity.
Troubleshooting
If Ratthew has not returned, continue normal shifts and watch for the next interaction instead of assuming the quest is broken at one exact shift. Do not restart only because one predicted meeting number passed.
If the safe does not respond, verify three states in order: the interaction chain is complete, the key was picked up and the cat poster has been removed. If the live game changes the prompt or room layout, follow the current interface and treat the older route as version-sensitive.
If the key was missed, return to the interaction area if the current run still allows it. A reset or replay may be required if the item is no longer available.
Reading the lore safely
Separate what the scene displays from what players infer. The photo and confidential experiment material are observable story clues. A conclusion about a character’s final identity is a theory unless dialogue, Journal text or another direct game record states it.
This distinction lets the safe remain important without turning an unresolved mystery into false certainty. Place the clue beside Ratthew’s and Liz’s interactions, then keep causal claims that the game never states labeled as theories.
Check the Journal after a major character interaction. Follow its wording when a player theory claims more than the entry says. A hidden room can deepen the mystery without resolving every relationship among Ratthew, Rattina, Shadow and the Stalker.
Frequently asked questions
Where do I get the Animal Hospital key?
Complete Ratthew’s multi-part interaction chain and collect the key he leaves after the relevant meeting.
Where do I use the key?
In Room 5. Remove or interact with the cat poster to reveal the hidden safe, then use the key there.
What reward is in the safe?
The safe reveals story clues involving Rattina and a Shadow experiment, not a combat, currency or class-stat reward.