
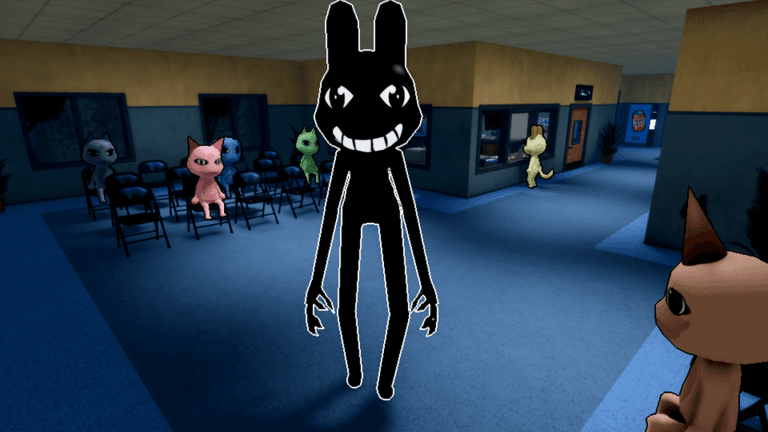
Barney is a multi-step character whose requests include Coffee, guarding a box, taking a photo, getting a Scalpel and finding a hiding place. At the final branch, hiding him rewards a second Coffee Machine, while reporting him unlocks the other Journal path and gives up that machine. The game shows unsettling changes and threats but never conclusively names Barney’s condition.
Character overview
Barney returns across several interactions instead of resolving in one visit. His requests mix ordinary items with increasingly unsettling events. Keep the requested actions, final choice and theories about what happened to him separate while following the chain.
Exact arrival shifts can vary. Follow the completed interaction sequence and confirm progress in the Journal rather than assuming every meeting must occur at one fixed number. If Barney has not returned, continue the shift and check the last completed Journal step.
Interaction timeline
- Request
Bring Coffee
Complete the Coffee interaction and confirm that Barney’s chain advances.
- Task
Guard the box
Follow the current prompt for the protected-box step rather than leaving before it records.
- Evidence
Take the photograph
Complete the requested photo interaction and check the Journal or next return.
- Item
Get the Scalpel
Bring the named Scalpel when Barney’s later request calls for it.
- Choice
Hide or report Barney
Read the final prompt and choose the reward path intentionally.
The order matters more than the shift number. Complete the current request before preparing the next item.
Between visits, continue ordinary shift work and keep the next named requirement in mind. A recurring NPC chain may be interrupted by treatment, anomalies or other story events. Those interruptions do not justify skipping forward in the sequence or assuming the ending has triggered without the final prompt.
The final choice
Hiding Barney is associated with a second Coffee Machine. Reporting him leads to the alternate Journal outcome or reward and does not grant that machine. The two results are mutually important because a player cannot treat the Coffee Machine as a reward from both branches.
Decide before selecting the prompt. Choose hiding if the second Coffee Machine is the goal. Choose reporting if completing the other Journal path matters more. Plan on replaying to see both outcomes rather than expecting a same-run reversal.
Managing the chain during a shift
Barney’s requests arrive alongside ordinary hospital work, so keep one clear checkpoint: the last request completed and the next object or action named. Do not carry several guessed quest items in advance. A guessed item can crowd the backpack, distract from a patient assignment and make it harder to notice when Barney’s prompt changes.
In a team, tell the other players when one person is handling Barney so the same Coffee or Scalpel is not collected twice. In solo play, finish the current patient action before leaving for his request unless the live prompt gives a deadline. After every interaction, look for a Journal update or the next visible instruction. This keeps quest progress separate from assumptions about his condition.
Confirmed facts
- Barney has multiple separate interactions.
- His requests include Coffee, a box, a photograph and a Scalpel.
- The final decision is between hiding and reporting him.
- Hiding is tied to a second Coffee Machine.
- Reporting produces the alternate Journal outcome without that machine.
What remains theory
Barney’s visual changes, requests and threatening behavior may suggest that he is infected or anomalous, but no diagnosis appears during the branch. Choose between hiding and reporting without waiting for a medical label.
His appearance changes still matter because they explain the tension behind the final choice. They do not change the reward split or the steps required to reach it.
The unsettling details make the final prompt feel different from an ordinary delivery quest. When the choice appears, compare its concrete outcomes: hiding leads to the second Coffee Machine, while reporting leads to the alternate Journal result. Barney’s condition does not change that branch decision.
Common mistakes
- Do not choose the final branch before deciding which outcome you want.
- Expect the second Coffee Machine only on the hide path.
- Do not choose the branch on the assumption that Barney has a confirmed diagnosis.
- Do not promise a fixed arrival shift for each meeting.
- Do not leave an item step before the interaction records.
If Barney does not return, continue normal progression and check the Journal for the last completed step. If the prompt differs from this dated sequence, follow the current game rather than forcing an older walkthrough.
Frequently asked questions
What happens if I hide Barney?
Hiding him awards a second Coffee Machine.
What happens if I report Barney?
Reporting him follows the alternate Journal outcome or reward and gives up the second Coffee Machine.
Is Barney confirmed to be infected?
No. His changes support theories, but the game does not conclusively label his condition.