
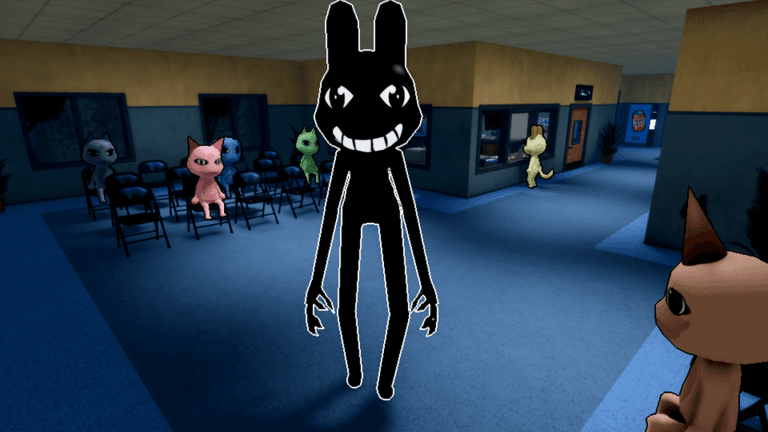
The safest response to the Stalker is to avoid looking at its face, lower your camera and move away when the light or sound warning begins. Gun and Taser attacks do not kill it. Sanity loss varies between encounters, so react to the warning instead of planning around one damage number.
Confirmed warning signs
Flickering lights and an audio cue are commonly reported before or during a Stalker encounter. These warnings matter because searching the room for the enemy can create the dangerous face contact the player is trying to avoid. React to the cue first and identify a safe movement path without raising the view.
Newer versions can include a front-desk patient form or interaction. Whether or not that behavior appears, respond to the light or sound warning by lowering the view and moving away.
Survival steps
- Stop scanning for the Stalker’s face when the cue begins.
- Angle the camera down so the face stays out of view.
- Move around or away from the threat instead of confronting it.
- Do not fire a Gun or Taser in the expectation that it will be removed.
- Resume the patient route only after the encounter has cleared.
The purpose of the lowered view is not to hide every part of the screen; it is to avoid direct face exposure while preserving enough orientation to move. Learn nearby walls and corridors so the response does not become blind panic.
In team play, a short warning helps others stop looking toward the same area. Do not ask a teammate to confirm the face for you. In solo play, choose a movement direction from the map knowledge you already have and avoid opening menus while the cue is active.
Practicing the camera response
Learn the nearby corridor shapes during calm moments so lowering the camera does not leave the player unable to move. When the warning begins, choose a direction already known to be clear, angle the view down and keep moving without searching for the face. A teammate can call a safe direction, but nobody should turn toward the threat simply to confirm its position.
After the cue clears, raise the view gradually and recheck the route before reopening a menu or resuming treatment. This turns the warning response into a repeatable movement habit instead of a panicked visual search.
Why weapons do not solve it
Gun and Taser attacks are ineffective against the Stalker. That makes Secret Agent’s combat focus a poor counter for this specific threat, even though the class may have uses elsewhere. Wasting ammunition also keeps the player facing the danger longer.
Enemy-specific immunity is why a general “best weapon” answer would be misleading. Confirm the threat before choosing a counter. For the Stalker, visual avoidance and movement are better supported than aggression.
Sanity damage conflict
Reported Sanity-loss values include two and ten. The gap may reflect game versions or encounter states, so use the warning cue as the decision point rather than either number.
The practical decision does not require the exact number: face exposure is a risk and should be avoided.
Stalker versus patient anomalies
The Stalker is a roaming hostile encounter, not another entry to add to a patient-anomaly count. Patient anomalies are identified through appearance, photos and CCTV observations during diagnosis. Mixing the categories produces inflated totals and the wrong response.
A suspicious patient should be checked through its model, photo and CCTV. A Stalker warning calls for camera control and avoidance. Keeping those loops separate prevents a player from staring at the enemy for visual confirmation or treating enemy behavior as a patient clue.
After the encounter, re-establish the patient queue rather than assuming every nearby case was part of the event. Check what task was interrupted, return unused items to the plan and confirm that another player did not already take over the patient while the threat was active.
Lore theory boundary
Rattina’s possible connection to the Stalker remains a theory. The Room 5 safe is a separate story route, while a live Stalker encounter always calls for the same camera and movement response. Survive first instead of trying to resolve the enemy’s identity during the warning.
Common mistakes
- Do not raise the view to confirm the face after the warning.
- Do not waste ammunition trying to kill the Stalker.
- Do not plan the encounter around one disputed Sanity value.
- Do not add the Stalker to the patient-anomaly total.
- Keep the Rattina theory separate from the survival decision.
Frequently asked questions
How do I survive the Stalker?
React to the light or sound cue, lower the camera, avoid its face and move away until the encounter clears.
Can Secret Agent shoot the Stalker?
The Gun and Taser are ineffective against it. Use avoidance rather than combat.
What should I do after the encounter?
Recheck the task that was interrupted, confirm whether a teammate took over the patient and resume the queue only after the warning has cleared.